Get hooked on crochet with these unique granny squares
In need of a spring time hobby? Get hooked on crocheting and find out how you can make these three different unique granny square designs, from Crochet Squares by Maria Gullberg.
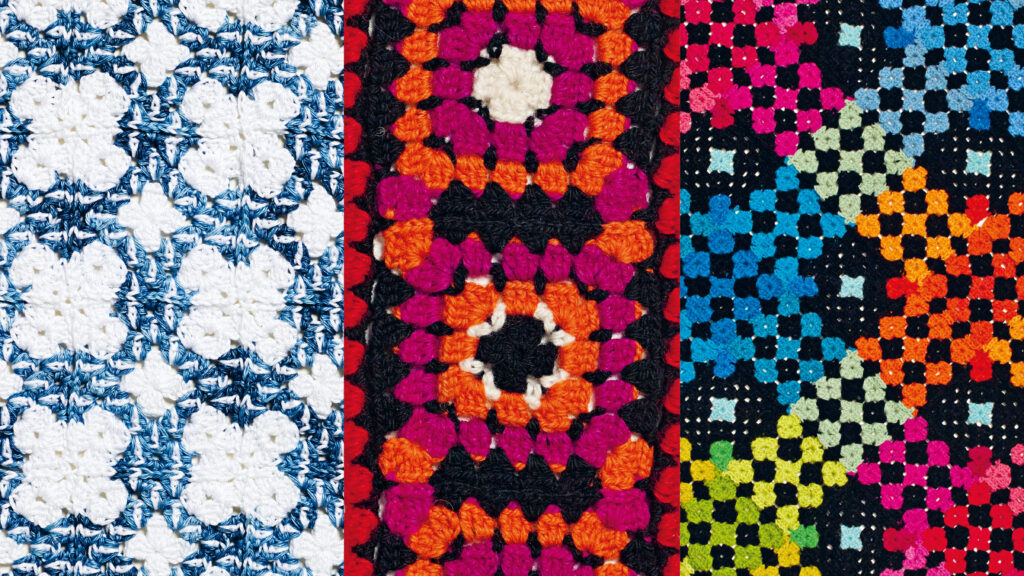
Agda
The Agda square is a slightly easier version of the Hilda square (p. 51) which, among other things, uses more colour. I have been inspired by woven patterns for both squares.
Level: Easy if you are used to colour changes
Square size: 5.5 × 5.5cm
Yarn: 2–/3–ply cotton yarn
Crochet hook: 2.5mm or size needed to obtain tension
Colours: 2
The wrong side will be just as nice as the right side since there aren’t any ‘floats’ on the reverse because the colour changes are made in the treble crochet groups.
Start by making a magic ring for a closed centre or work 6 ch and sl st to first ch to form a ring.
Follow the chart via the link below.
Project suggestions
Vest: see chart on p. 160.
Ladies’ jumper: see chart on p. 161.
Waistcoat or slipover: see chart on p. 163.
Child’s blanket: for a blanket measuring 71.5 × 110cm you will need 260 squares arranged 13 × 20.
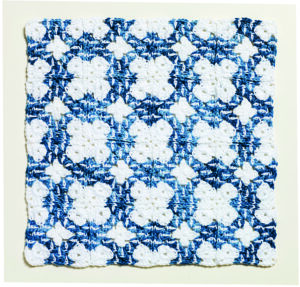
Ulla-Bella
I’ve taken inspiration from vintage textiles for this square. I have put together several squares into lengths and crocheted a border with bobbles along the long sides. The lengths can become the hem for a jumper – or several squares can become a blanket with a border.
Level: Easy
Square size: 8 × 8cm
Yarn: 2–ply wool yarn
Crochet hook: 2.5mm or size needed to obtain tension
Colours: 4 colours per square, plus 2 colours for the border (black + 1 colour for the bobbles)
Start by making a magic ring for a closed centre, or work 6 ch and sl st in first ch to form a ring.
Work the last round of the border with the bobbles from the wrong side of the work. This will make the bobbles ‘pop’ out on the right side. Bobbles are essentially big clusters (see p. 12), so follow the instructions for a cluster stitch, but replace 3 tr stitches with 5, ultimately drawing the yarn through 6 hook stitches.
Follow the chart via the link below. The chart shows 1 ½ squares plus parts of the border. The two squares are identical, apart from the colour order.
Project suggestions
Braces: Crochet squares to the required length, assemble and crochet the border with bobbles along both long sides. Braces can look nice added to a skirt and paired with a blouse or a t-shirt. Secure the braces in place with buttons or clips.
Cushion: Crochet lengths with the border along all sides and sew to the backing for a cushion cover, or crochet squares to create a cushion cover. For example, 36 squares arranged 6 x 6 make a cover that measures 48 × 48cm. With the border the cover will measure approx. 50cm.
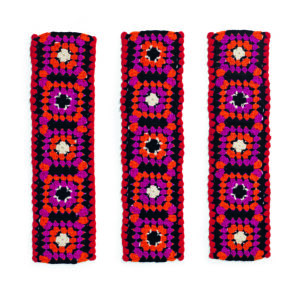
Lollipop
The round circle in the middle is based on vintage crocheted potholders, and the edge around the circle is worked like a granny square. The lollipops stand out from the darker background, which gives a fun, graphic depth to the pattern.
Level: Advanced
Square size: 15.5 × 15.5cm
Yarn: 2–/3–ply cotton yarn
Crochet hook: 2.5mm or size needed to obtain tension
Colours: 5–8 colours (2 for each lollipop swirl, 1 for the
centres, 3 for the background and border)
Start by making a magic ring for a closed centre, or work 6 ch and sl st to first ch to form a ring.
Follow the chart via the link below. The chart shows a white and red swirl in the middle with light blue along two of the sides.
To make the white and blue swirl, swap the red for blue and make sure to crochet the light blue stitches on the last round (round 13) in two diagonally opposite corners.
The two rounds of the edging are shown on the top and left-hand edges of the chart. The last light blue round includes spike stitches that go down two rounds and sit on the right side of the work.
Assembly
Crochet the squares together as and when they’re finished.
Crochet the border around the whole work.
First round of the border: work double crochet in the back loops only of the stitches of the previous round or into the ch sps.
Second round of the border: work the dcs in the back loops only and long trs in the front loops only on round 13. The long treble crochet stitches are worked as follows: yo and insert the hook into the front loop on round 13 so that the yarn sits on top of round 14. Finish working the treble crochet so that it comes up to the current round you’re working on.
Project suggestions
Cushion: for a cushion measuring 62 × 62cm you will need 16 squares arranged 4 × 4. For a rectangular cushion measuring 31 × 62cm you will need 8 squares arranged 2 x 4. You can decorate the cushion with red pompoms in the corners – see how to make pompoms on p. 40.
Child’s blanket: for a blanket measuring 77.5 × 108.5cm you will need 35 squares arranged 5 × 7.
Bag: for a bag measuring 31 × 31 cm you will need 4 squares arranged 2 × 2 for the front panel. Assemble the squares and sew together with a back panel of leather or wool. Line the bag. Crochet a handle: 10 ch and work dc rows through both loops to make it sturdy. Crochet to length of your choice and sew onto the bag.
More about Crochet Squares:
Uncover 30 magical crochet patterns with this beautiful hardback, ranging from classic granny squares to mosaic crochet. In this book you’ll discover squares to crochet that you’ll never have seen before. With projects suitable for all abilities, from beginner through to intermediate and advanced, there’s plenty to ignite your imagination. Crochet Squares is available to purchase here.
